![]()

更新:2017-02-13 10:18
大小:3.3M
下载地址扫描二维码安装到手机
 50%(10票)
 50%(10票)
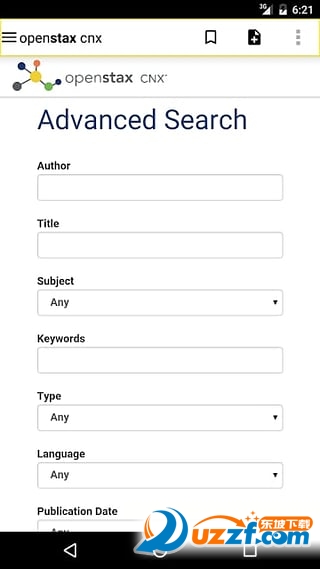

为安卓系统建立联系是自由教育资源全世界贮藏库被出版根据一个创造性的共同性归属执照。保存项目对您的喜爱并且观看连接使所有满意在机器人的连接App。

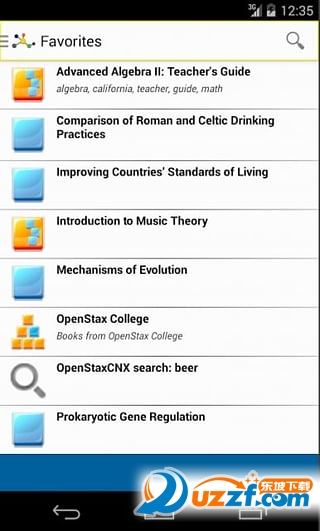
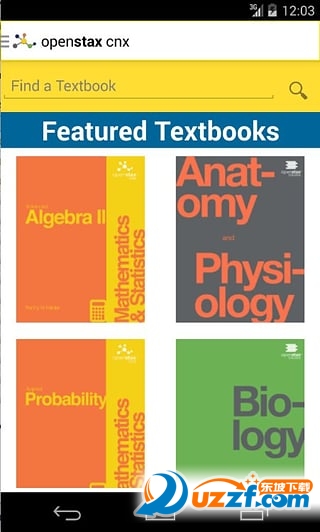
1.在应用程序视图的教科书。
2.在图书搜索
3.返回你在本书前面的位置
4.搜索OpenStaxCNX您需要的内容。
5.记笔记的应用程序,它们通过电子邮件或文本导出为文本文件到您的手机或共享。
一、问题
1.Xml文件是布局基础,但是它是怎么样和Activity建立联系的,作为视图展示到手机屏幕上的?
2.findViewById()是怎样找到对应的Xml文件中的元素并把Xml文件中的元素展示成一个View?
3.怎样把一个Xml文件解析成View展示出来的呢?
二、几个关键的对象
DecorViewmDecor;//Thisisthetop-levelviewofthewindow,containingthewindowdecor.
ViewGroupmContentParent;//Thisistheviewinwhichthewindowcontentsareplaced.ItiseithermDecoritself,orachildofmDecorwherethecontentsGo.
ViewGroupmContentRoot;//Thisistheviewinwhichthewindowcontents
LayoutInflatermLayoutInflater;//
三、Window展示视图的结构
在手机上展示出来的内容结构是下图中这样的,在最外层有一个顶级容器DecorView,然后是我们的内容的根视图mContentRoot(ViewGroup),然后才是我们Xml或者new出来的View。
四、从源码了解
从setContentView(layoutResID)着手,一般我们设置Activity的Layout时都是通过该方法设置对应的layoutId,然后把layoutId对应的Xml文件解析成我们看到的视图界面,所以入手点就是我们熟知并且使用过千百遍的setContentView(layoutResID),先看一下源码:
publicvoidsetContentView(intlayoutResID){
//Note:FEATURE_CONTENT_TRANSITIONSmaybesetintheprocessofinstallingthewindow
//decor,whenthemeattributesandthelikearecrystalized.Donotcheckthefeature
//beforethishappens.
if(mContentParent==null){//step1
installDecor();
}elseif(!hasFeature(FEATURE_CONTENT_TRANSITIONS)){
mContentParent.removeAllViews();
}
if(hasFeature(FEATURE_CONTENT_TRANSITIONS)){
finalScenenewScene=Scene.getSceneForLayout(mContentParent,layoutResID,
getContext());
transitionTo(newScene);
}else{
mLayoutInflater.inflate(layoutResID,mContentParent);//step2
}
……
}
这段代码就是本文的入口,从step1开始分析,先判断mContentParent是否是空的,如果是空的则执行installDecor(),初始化后第一次打开页面mContentParent肯定是空的,所以执行installDecor()方法,先不用管对应的elseif判断条件中的内容,这不是我们要了解的重点,那么接下来看一下installDecor()是干什么的呢:
privatevoidinstallDecor(){
if(mDecor==null){
mDecor=generateDecor();
……
}
if(mContentParent==null){
mContentParent=generateLayout(mDecor);
……
}
}
这个方法的比较长,大部分是和本文的主题不相关的,关键的也就那么几行,去掉不重要的代码让我们的思路更清晰。只要找准这几个关键的地方就可以明白这个所表达的真正含义了,其它的都是附属品。从方法名的字面意思可以看出这个方法的目的就是install展示内容的Decor(DecorView),这就是我们在目录二中提到的关键对象之一,这个对象是做什么的呢,它就是手机上看到的应用视图的顶级View,所有的在手机上呈现出来的view的顶级容器,它继承自FrameLayout,每一个打开的手机窗口首先都是有一个顶级的容器来装载我们要展示的内容。从第一个if语句开始,如果mDecor是null则mDecor=generateDecor(),generateDecor()的目的是生成一个没有feature的DecorView。再看第二个if语句,它的目的是生成mContentParent,也是目录二中提到的关键对象之一(它是这是窗口内容被放置的视图,它可以是mDecor本身,也可以是一个子mDecor的内容,这里就要视情况而论了,当作为子view(inflate一个view的时候)就是mDecor本身),这个方法的内容也是非常多,关键的内容也还是那么几行,其它的都是针对设置的feature做相应的配置信息,例如,actionbar、floatWindow等。
/**
*TheIDthatthemainlayoutintheXMLlayoutfileshouldhave.
*/
publicstaticfinalintID_ANDROID_CONTENT=com.android.internal.R.id.content;
protectedViewGroupgenerateLayout(DecorViewdecor){
……
mDecor.startChanging();
……
ViewGroupcontentParent=(ViewGroup)findViewById(ID_ANDROID_CONTENT);
//ID_ANDROID_CONTENT是com.android.internal.R.id.content,这就是内容展示的主要view
……
returncontentParent;
}
这样1千多行的代码就被很好的分解了,得到希望看到的内容,剔除掉和目的不相关的干扰项剩下的就是真相。这个过程大体就可以清楚了,通过findViewById找到google定义的一个内部view,赋给contentParent作为返回内容,然后再回到setContentView(layoutResID)中看关键代码:
if(hasFeature(FEATURE_CONTENT_TRANSITIONS)){
finalScenenewScene=Scene.getSceneForLayout(mContentParent,layoutResID,
getContext());
transitionTo(newScene);
}else{
mLayoutInflater.inflate(layoutResID,mContentParent);//这是重点
}
绕了半天终于用到了我们最关心的一个变量layoutResID,这一句代码是不是很熟悉,在使用listview的时候,getView中常会用到的或者使用fragment时常用到的,当然还有很多地方我们都会用到,例如,here。
接下来,查看方法inflate:
publicViewinflate(@LayoutResintresource,@NullableViewGrouproot){
returninflate(resource,root,root!=null);
}
然后再进入到方法inflate(resource,root,root!=null):
publicViewinflate(@LayoutResintresource,@NullableViewGrouproot,booleanattachToRoot){
finalResourcesres=getContext().getResources();
……
finalXmlResourceParserparser=res.getLayout(resource);
try{
returninflate(parser,root,attachToRoot);
}finally{
parser.close();
}
}
现在离我们的目的已经不远了,其实已经很明了了,就是通过一个Xml解析器解析我们的Xml文件,然后返回解析后的View,我们继续往下看:
publicViewinflate(XmlPullParserparser,@NullableViewGrouproot,booleanattachToRoot){
synchronized(mConstructorArgs){
Trace.traceBegin(Trace.TRACE_TAG_VIEW,"inflate");//记录解析日志
finalContextinflaterContext=mContext;
finalAttributeSetattrs=Xml.asAttributeSet(parser);//通过parser中得到layout中的所有view的属性集保存在attrs中
ContextlastContext=(Context)mConstructorArgs[0];
mConstructorArgs[0]=inflaterContext;
Viewresult=root;
try{
//Lookfortherootnode.
……
finalStringname=parser.getName();//得到layout的节点name,例如,view、merge、include等
……
if(TAG_MERGE.equals(name)){//这里忽略,先不研究merge
if(root==null||!attachToRoot){
thrownewInflateException("<merge/>canbeusedonlywithavalid"
+"ViewGrouprootandattachToRoot=true");
}
rInflate(parser,root,inflaterContext,attrs,false);
}else{//忽略merge后的入口entrence
//Tempistherootviewthatwasfoundinthexml
finalViewtemp=createViewFromTag(root,name,inflaterContext,attrs);
ViewGroup.LayoutParamsparams=null;
if(root!=null){
//Createlayoutparamsthatmatchroot,ifsupplied
params=root.generateLayoutParams(attrs);
if(!attachToRoot){//note1
//Setthelayoutparamsfortempifwearenot
//attaching.(Ifweare,weuseaddView,below)
temp.setLayoutParams(params);
}
}
//Inflateallchildrenundertempagainstitscontext.
rInflateChildren(parser,temp,attrs,true);
//Wearesupposedtoattachalltheviewswefound(inttemp)
//toroot.Dothatnow.
if(root!=null&&attachToRoot){
root.addView(temp,params);
}
//Decidewhethertoreturntherootthatwaspassedinorthe
//topviewfoundinxml.
if(root==null||!attachToRoot){
result=temp;
}
}
}catch(XmlPullParserExceptione){
……
}catch(Exceptione){
……
}finally{
……
}
Trace.traceEnd(Trace.TRACE_TAG_VIEW);
returnresult;
}
}
在这个方法中,通过resource在parser解析出layout中所有元素的属性然后放在变量attrs中,然后在上述代码红色标记的entrence处调用createViewFromTag方法根据attrs属性集中的属性创建出对应的view,到这儿,基本上已经可以大概知道view创建的流程,为了更详细的去了解过程,我们有必要看剩下最后一个关键的方法createViewFromTag(root,name,inflaterContext,attrs):
ViewcreateViewFromTag(Viewparent,Stringname,Contextcontext,AttributeSetattrs,
booleanignoreThemeAttr){
……
Viewview;
if(mFactory2!=null){
view=mFactory2.onCreateView(parent,name,context,attrs);
}elseif(mFactory!=null){
view=mFactory.onCreateView(name,context,attrs);
}else{
view=null;
}
if(view==null&&mPrivateFactory!=null){
view=mPrivateFactory.onCreateView(parent,name,context,attrs);
}
if(view==null){
finalObjectlastContext=mConstructorArgs[0];
mConstructorArgs[0]=context;
try{
if(-1==name.indexOf('.')){
view=onCreateView(parent,name,attrs);
}else{
view=createView(name,null,attrs);
}
}finally{
mConstructorArgs[0]=lastContext;
}
}
returnview;
……
}
这里就是把从Xml中解析出来的内容根据变量name生成对应的View对象,其实后面的实现不用看源码也可以想到了,用反射生成对应的View对象,然后一级一级的向来时的路返回给调用方法。但是为了证实我们的猜测还是要仔细的研究一番,先看第一个if语句,很简单,就是通过工厂去创建View,Activity实现了接口Factory2,在Activity源码中可以看到具体实现,进入Activity查看源码:
Factory2:
publicViewonCreateView(Viewparent,Stringname,Contextcontext,AttributeSetattrs){
if(!"fragment".equals(name)){
returnonCreateView(name,context,attrs);
}
returnmFragments.onCreateView(parent,name,context,attrs);
}
Factory:
publicViewonCreateView(Stringname,Contextcontext,AttributeSetattrs){
returnnull;
}
可以看到如果我们没有使用fragment,则最后返回的都是null,那么再回到createViewFromTag方法中继续看下面的代码,mPrivateFactory也是Factory2的一个对象,所以还是一样的看Activity中代码,得出同样的结果返回null,这样的话,真正创建View的代码就是通过第三个if语句实现的,找到关键地方try包裹的代码,view=onCreateView(parent,name,attrs)和view=createView(name,null,attrs)两个方法最终实现都会调用createView(Stringname,Stringprefix,AttributeSetattrs),这样我们就可以找到源头了:
publicfinalViewcreateView(Stringname,Stringprefix,AttributeSetattrs)
throwsClassNotFoundException,InflateException{
Constructor<?extendsView>constructor=sConstructorMap.get(name);
Class<?extendsView>clazz=null;
try{
Trace.traceBegin(Trace.TRACE_TAG_VIEW,name);
if(constructor==null){
//Classnotfoundinthecache,seeifit'sreal,andtrytoaddit
clazz=mContext.getClassLoader().loadClass(
prefix!=null?(prefix+name):name).asSubclass(View.class);
if(mFilter!=null&&clazz!=null){
booleanallowed=mFilter.onLoadClass(clazz);
if(!allowed){
failNotAllowed(name,prefix,attrs);
}
}
constructor=clazz.getConstructor(mConstructorSignature);
constructor.setAccessible(true);
//这里是view缓存
sConstructorMap.put(name,constructor);
}else{
//Ifwehaveafilter,applyittocachedconstructor
if(mFilter!=null){
//Haveweseenthisnamebefore?
BooleanallowedState=mFilterMap.get(name);
if(allowedState==null){
//Newclass--rememberwhetheritisallowed
clazz=mContext.getClassLoader().loadClass(
prefix!=null?(prefix+name):name).asSubclass(View.class);
booleanallowed=clazz!=null&&mFilter.onLoadClass(clazz);
mFilterMap.put(name,allowed);
if(!allowed){
failNotAllowed(name,prefix,attrs);
}
}elseif(allowedState.equals(Boolean.FALSE)){
failNotAllowed(name,prefix,attrs);
}
}
}
Object[]args=mConstructorArgs;
args[1]=attrs;
finalViewview=constructor.newInstance(args);
if(viewinstanceofViewStub){
//UsethesamecontextwheninflatingViewStublater.
finalViewStubviewStub=(ViewStub)view;
viewStub.setLayoutInflater(cloneInContext((Context)args[0]));
}
returnview;
……
}
这样就证实我们的猜想,确实是通过反射来创建View,然后我们的任务也就完成了。需要注意的是,通过反射创建的View对象返回的都是View类型的对象,在使用时需要强制转换。可以总结为:在activity中指定的layoutId去找到对应的Xml文件,然后通过Xml解析生成对应的View然后inflate到窗口顶级容器DecorView中绘制展现出来。
回到我们的目录二问题中,1和3都已经清楚了,那么问题2是什么样的结果呢,其实这个很简单,在创建View的时候已经从Xml文件中解析到完整的view属性attrs,在使用反射创建view时会通过构造函数生成对应的对象,所以会用到View的构造方法,在View(Contextcontext,@NullableAttributeSetattrs,intdefStyleAttr,intdefStyleRes)方法中有一句代码mID=a.getResourceId(attr,NO_ID),这样就可以从attribute中把解析到的ID放在mID变量中,然后在findViewByID(id)中,根据参数id返回对应的View,需要注意的是,在findViewById时要用到findViewTraversal(@IdResintid)方法,在这里如果指定find的范围(比如,在FrameLayout中去找),则使用ViewGroup中的findViewTraversal(@IdResintid)方法,先获取到ViewGroup的所有子View,然后通过遍历子View找到对应的View并返回,查看下面代码。
protectedViewfindViewTraversal(@IdResintid){
if(id==mID){//如果等于当前ViewGroup的Id,则返回该ViewGroup
returnthis;
}
finalView[]where=mChildren;
finalintlen=mChildrenCount;
for(inti=0;i<len;i++){//其它情况则遍历所有子View,返回对应的View
Viewv=where[i];
if((v.mPrivateFlags&PFLAG_IS_ROOT_NAMESPACE)==0){
v=v.findViewById(id);
if(v!=null){
returnv;
}
}
}
returnnull;
}
note1:记得在使用listView的时候的最后一个boolean参数时,看到很多人都有使用该变量,也没去详细了解,只是习惯性的去使用。在note1标记处给出了合理的解释,大概大概意思是如果我们没有为temp设置params则使用setLayoutParams(temp.setLayoutParams(params))方法设置,如果设置过则使用addView方法为temp添加params(root.addView(temp,params))。
1,优化了操作
2,修复了已知bug
 下载
领航桌面(安卓手机系统桌面)
5.7M /
下载
领航桌面(安卓手机系统桌面)
5.7M /
小编简评:领航桌面是
 下载
安卓手机系统管理软件(全能工具箱)
8.1M /
下载
安卓手机系统管理软件(全能工具箱)
8.1M /
小编简评:安卓手机系
 下载
安卓手机系统清理软件(Naver管家)
3.3M /
下载
安卓手机系统清理软件(Naver管家)
3.3M /
小编简评:安卓手机系
 下载
安卓手机系统优化软件(CM Speed Booster)
1.7M /
下载
安卓手机系统优化软件(CM Speed Booster)
1.7M /
小编简评:安卓手机系
 下载
真正影子系统2008正式光盘免激活免费版
61.5M /
下载
真正影子系统2008正式光盘免激活免费版
61.5M /
小编简评:先安装影子
 下载
中小学成绩管理系统
10.0M /
下载
中小学成绩管理系统
10.0M /
小编简评:这是一套专
 下载
易通稿件管理系统
5.0M /
下载
易通稿件管理系统
5.0M /
小编简评:易通稿件管
 下载
人脸图像合成系统FaceForge
7M /
下载
人脸图像合成系统FaceForge
7M /
小编简评:安装过程是
 下载
微软错误代码表查询系统(MS Windows Error Messages)
68KB /
下载
微软错误代码表查询系统(MS Windows Error Messages)
68KB /
小编简评:亲你在使用
 应用商店(小米自带)app
34.1M
4.39.0 官方版
应用商店(小米自带)app
34.1M
4.39.0 官方版
 nubia应用中心最新版
15.9M
4.3.0.062814 官方手机版
nubia应用中心最新版
15.9M
4.3.0.062814 官方手机版
 双开助手微分身版
16.2M
9.7.6 官方正式版
双开助手微分身版
16.2M
9.7.6 官方正式版
 互传vivo一键换机app
29.7M
6.2.13.1 官方最新版
互传vivo一键换机app
29.7M
6.2.13.1 官方最新版
 华为应用市场2023最新版
51.1M
13.3.1.200 官方版
华为应用市场2023最新版
51.1M
13.3.1.200 官方版
 葫芦侠最新版本
29.3M
v4.2.1.8.2 官方版
葫芦侠最新版本
29.3M
v4.2.1.8.2 官方版
 q绑查询手机号免费网站
4.2M
2.0 免费版
葫芦侠最新版本
29.3M
v4.2.1.8.2 官方版
q绑查询手机号免费网站
4.2M
2.0 免费版
葫芦侠最新版本
29.3M
v4.2.1.8.2 官方版
 p搜官网下载
6.7M
8.1 安卓版
p搜官网下载
6.7M
8.1 安卓版
 joiplay模拟器最新版
23.5M
1.20.023 中文版
joiplay模拟器最新版
23.5M
1.20.023 中文版
 q查手机号小工具
1.8M
1.35 手机版
q查手机号小工具
1.8M
1.35 手机版
 joiplay三件套汉化版
114.9M
1.01.701 官方版
joiplay三件套汉化版
114.9M
1.01.701 官方版
 自动点击连点器app
 三星手表插件Galaxy watch3 plugin
 网恋看看最新版
 哔哩助手app(哔哩漫游)
 和屏app
和屏app
 apk管理器
 指南针罗盘
指南针罗盘
 蓝牙串口助手
 小鸡模拟器
小鸡模拟器
网友评论